https://appuals.com/fix-unable-to-display-current-owner/
“Unable to display current owner” is an error message that is sometimes displayed in the
Owner
box when users attempt to take ownership of a certain file or folder.
This behavior can happen for a lot of reasons, but this error is always
related to privileges of the user account.
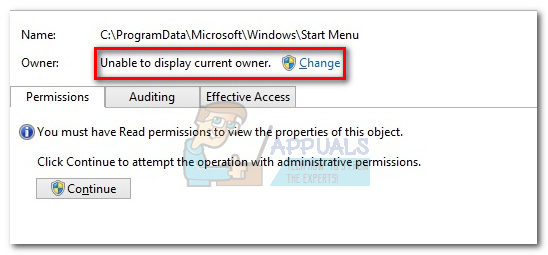
If users attempt to take ownership of a file that is displaying
“Unable to display current owner” in the
Owner box, it will yield the
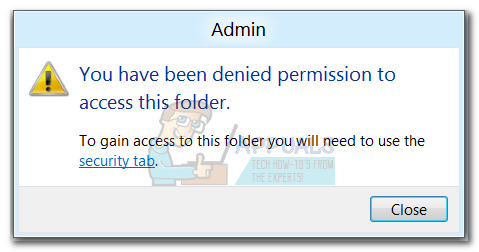
“Unable to set new owner on FOLDER, Access is denied” error. If the user attempts to open a file or folder with no displayed ownership, the following error will be displayed
“You have been denied permission to access this folder/file.”
The
Access Denied
error is usually displayed when a particular folder doesn’t have
permission, the folder is used by a program or the folder is read-only.
Typically, the error will occur if the
System group or the
Everyone group do not have
Full Control
privileges. However, there are other, more focused scenarios that will
trigger this behavior. Here’s a list of the most common culprits that
will create the grounds for the
“Unable to display current owner” error:
- Folder Lock or similar software is preventing the current user from accessing the path.
- The Admin account is not enabled on the system.
- Authenticated user doesn’t have Full Control.
- Folder or file in question contains damaged or corrupted files without a specified owner.
If
you’re currently struggling with the issue do not worry, as you’ll
probably solve your permission issue by the time you finish
troubleshooting with the methods below. Please follow each potential fix
in order as they are ordered by simplicity and severity. In the event
that you find some methods that are not applicable to your scenario,
simply skip them and continue with the next method below. Let’s begin!
Method 1: Uninstall Folder Lock (or similar software)
Folder Lock
and any other software with the same capabilities will allow you to
password-protect files and folders, as well as encrypt your important
files. However, a software like this is extra careful with handing out
account permissions. Depending on the initial tweaking you did on Folder
Lock (or similar software), you might find that certain files/folders
will become inaccessible for the other Windows accounts.
Note: If you didn’t install
Folder Lock or similar software, go straight to
Method 2.
There’s
also a bug going around with older versions of Folder Lock where users
have encrypted a folder with this software and were no longer able to
access its contents. This behavior might also happen with other Folder
Lock alternatives like
Ax Crypt,
AES Crypt or
Easy File Locker.
Luckily,
you can easily right this wrong by uninstalling the software that is
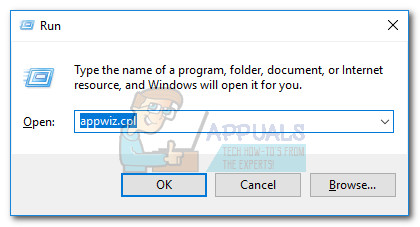
producing the issue. To do this, open a Run window (
Windows key + R), type “
appwiz.cpl” and hit
Enter to open
Programs and Features.
In
Programs and Features, scroll down to
Folder Lock (or similar software) and
right-click > Uninstall. After
you remove the folder encryption software, reboot your system and
whether you regain ownership of the respective file/folder. If you
didn’t, continue with the methods below.
Method 2: Allowing full access to authenticated users
Some users have been successful in solving the issue by allowing
Full Access
to all authenticated users. This might not be applicable in your
situation, but it’s one of the first things you should try before
following the other technical guides below.
Here’s a step-by-step guide through the whole thing:
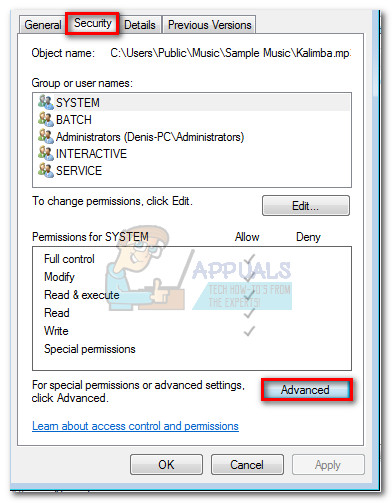
- Right-click on the file or folder in question and select Properties.
- Access the Security tab and click on Advanced.
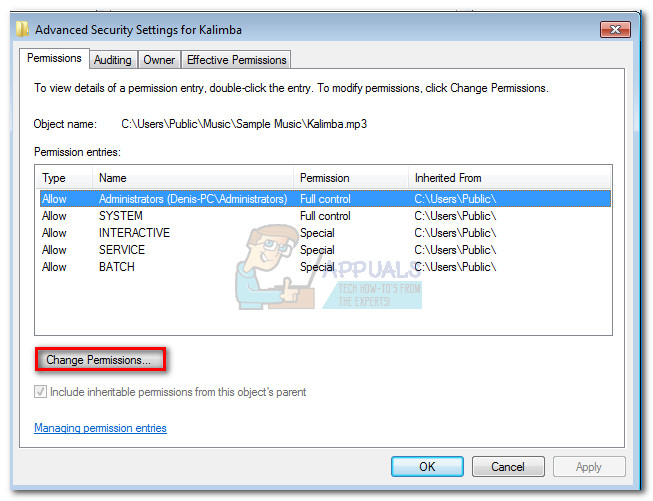
- In the Advanced Security Settings window, make sure the Permissions tab is selected and click on Change permissions.
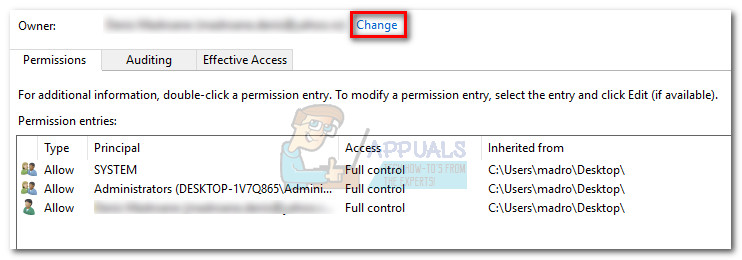
 Note: On Windows 8 and Windows 10, click on Change (next to Owner).
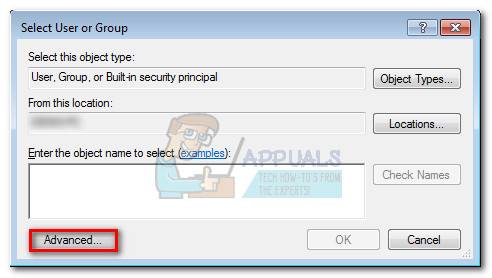
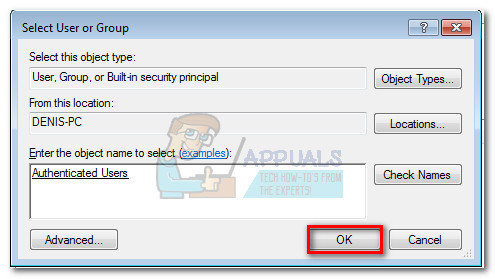
- Click on Add in the Permissions window, then click on Advanced when prompted by the Select User or Group Window.
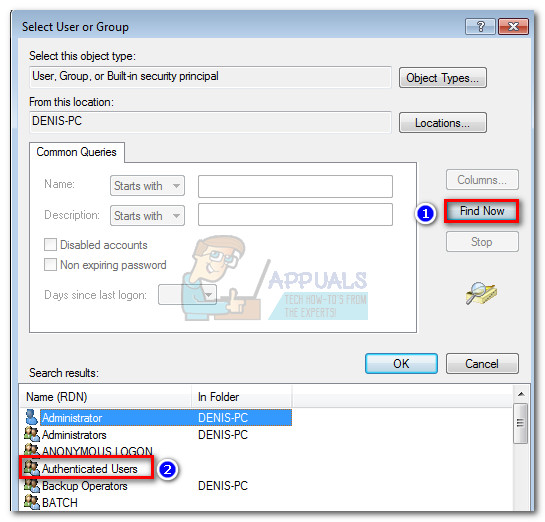
- In the next window, go to the Common Queries section and click the Find Now button. As soon as you click it, it will populate the search results list below. Scroll through the list and double-click on Authenticated users.
- Now that Authenticated Users is set as the object, hit Ok.
- In Permission Entry, check the Full control box under Allow and hit Ok.
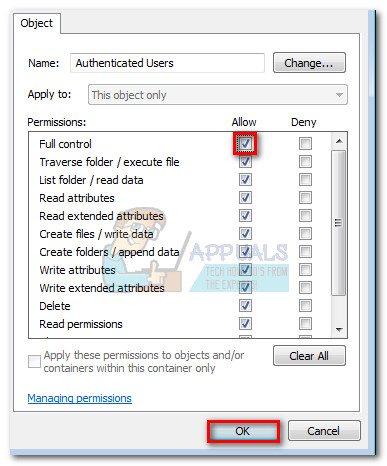
- Depending on the folder type, you might be prompted to confirm and then restart.
After your PC restarts check whether this method has solved your problem. If it hasn’t, move to the method below.
Method 3: Running chkdsk /F in elevated Command Prompt
When
a folder contains a file that is without an owner, it’s regarded as an
error in your file system and can usually be solved by running a simple
chkdsk /F command in an elevated
Command Prompt.
This
folder permission issue is quite common with Android Studio and other
IDE (Integrated Development Environment) folders and files. Let’s see if
this is the reason why the folder/file can not be accessed, modified or
deleted. If the scan manages to identifies an error in your file
system, the damaged files will automatically be deleted.
Follow the guide down below to perform the
chkdsk scan:
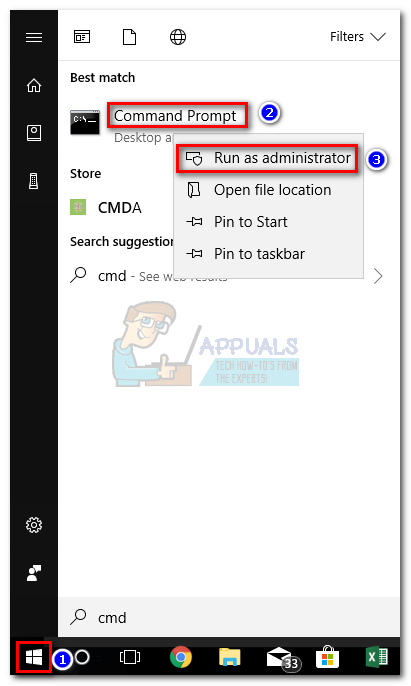
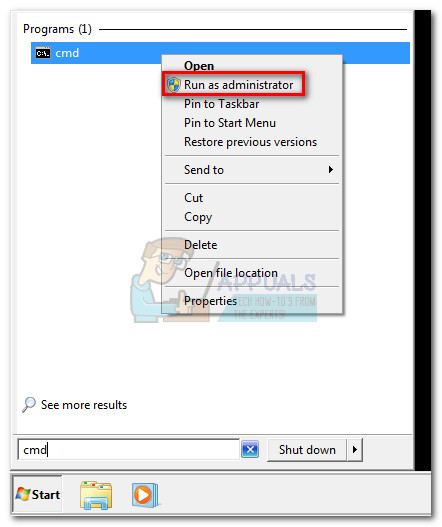
- Acess the Windows Start bar (bottom-left corner) and search for “cmd“. Then, right-click on Command Prompt and choose Run as Administrator.
- In the elevated Command Prompt, type cd + “exact path to folder or file” and hit Enter.
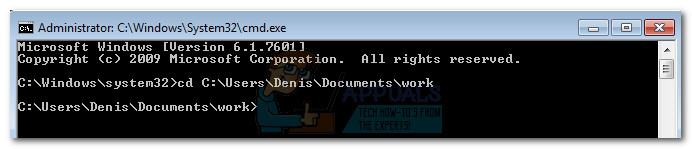
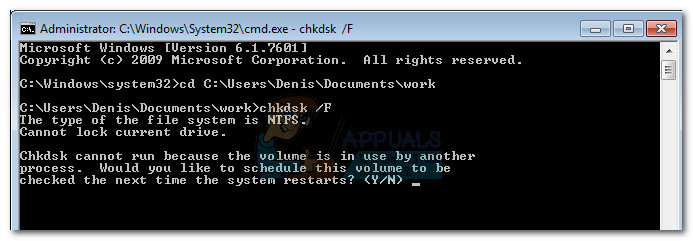
- Then, type chkdsk /F and hit Enter. If
that particular folder is located on your boot disk (C:), the elevated
Command Prompt will ask you whether to scan it at the next system
launch. Type Y and press Enter to confirm.
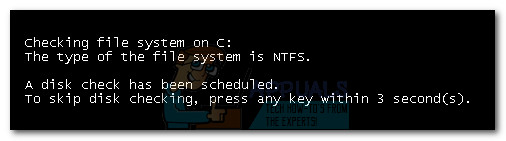
- If the prompt showed “This volume will be checked the next time the system restarts” after pressing Y, you can safely close the elevated Command Prompt and restart your PC.
- The
scan will automatically launch at the next reboot and any damaged files
will be deleted. Once your operating system loads fully, see if you’re
able to access, delete or modify the folder (file) in question.
If this method didn’t resolve your issue, move over to the next method.
Method 4: Enabling the built-in Administrator account
If
you started using Windows prior to the launch of Vista, you probably
remembered that all the older version of Windows had a built-in
Administrator account that was created by default. Fortunately, this
account is still created on Windows 10, 8.1, 8, 7 and Vista, but it’s
not enabled, so you can’t see it or use it by default.
Enabling the built-in
Administrator account has a high chance of solving the
“Unable to display current owner” error
because it has a lot more privileges than a regular administrator
account. Here’s a quick guide to enabling the built-in Admin account via
Command prompt:
Note: The following steps will work on Windows Vista, Windows 7, Windows 8, Windows 8.1 and Windows 10.
PRO TIP: If
the issue is with your computer or a laptop/notebook you should try
using Reimage Plus which can scan the repositories and replace corrupt
and missing files. This works in most cases, where the issue is
originated due to a system corruption. You can download Reimage by Clicking Here
- Acess the Windows Start bar (bottom-left corner) and search for “cmd“. Then, right-click on Command Prompt and choose Run as Administrator.
Note: You can also run Command Prompt as Administrator by selecting it and pressing Ctrl + Shift + Enter.
- In the elevated Command Prompt, type “net user administrator /active:yes” and hit Enter to enable the hidden Admin account.
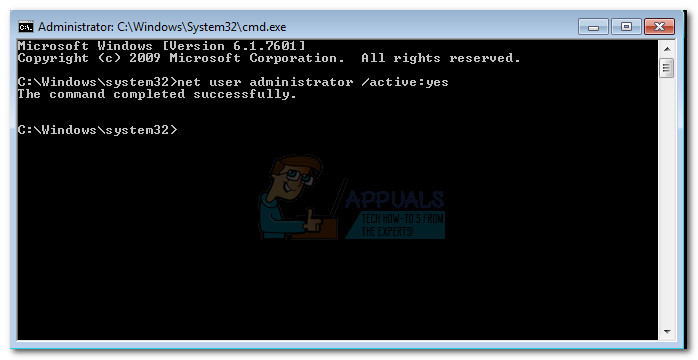
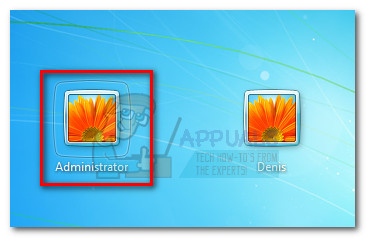
- Once you see that the command completed successfully, log out of your current user and you should see a new user named Administrator. Click on it to log in.
- Now
that you have logged into the built-in Administrator account, try to
access the folder/file that is giving you permission issues. You should
be able to access and/or modify it normally now.
Note:
Keep in mind that using the built-in Administrator at all times is not
recommended as certain actions can make your system vulnerable to
exploits. If this method has resolved your issue, we highly recommend to
follow the first step again and type
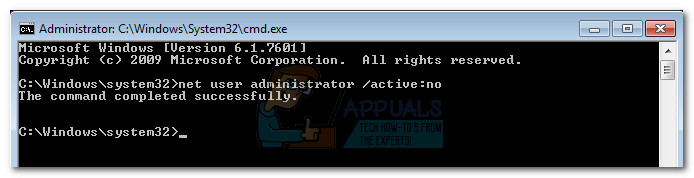
net user administrator /active:no to
disable the built-in administrator account. Then, reboot your system or
log-out of hidden Admin and revert back to your regular account.
If this didn’t solve your issue,
DO NOT use the
net user administrator /active:no command to disable the built-in administrator because we are going to use it again in the method below.
Method 5: Giving folder/file ownership to all Administrators
If
you weren’t able to access the folder or file when logged into the
built-in Administrator account, let’s use the account again to give
ownership of that particular file or folder to the entire Administrators
group.
Note: This method assumes that the method
above was not successful and you didn’t disable the hidden
administrator account. If you disabled it with the
net user administrator /active:no command, revert back to
Method 3 and redo step 1 to 3.
Once you are logged into the built-in Administrator account, follow the steps down below:
- Open another elevated Command Prompt. To do this, acess the Windows Start bar (bottom-left corner) and search for “cmd“. Then, right-click on Command Prompt and choose Run as Administrator.
- Type the following command into the elevated Command Prompt and hit Enter:
takeown /F “complete path of folder or file” /a /r /d y

Note:
If the operation is successful, you should get a SUCCESS message. In
the event that it returns the message “The system cannot find the file
specified”, double-check the exact path of your file or folder.
- Type the following command into the elevated Command Prompt and hit Enter:
icacls “complete path of folder or file” /grant administrators:F /t
 Note: If the command was successful, it will show the message “Successfully processed 1 (or more) files“. If it shows “Successfully processed 0 files” and “Failed processing 1 (or more) files“, the operation did not succeed.
- If
the operation succeeded, try accessing the folder/file that was giving
you trouble and see if the commands that we’ve just performed have
resolved the issue.
If the issue is now resolved, use the
net user administrator /active:no in
an elevated Command Prompt to disable the built-in Administrator
account. In case you’re still encountering the issue, move to the method
below.
Method 6: Running in Diagnostic Startup (Safe Mode)
If
all the methods above have failed you, there’s one final method that
will most likely enable you to access and edit the folder or file that
is giving you trouble. This method involves booting your PC in
Safe mode (Diagnostic Startup).
This will typically enable you to access the folder from a regular
administrator account. But if it doesn’t, we’re going to use the hidden
administrator again to get the job done.
Follow the steps below to boot your PC in Safe Mode and access the file via the hidden admin (if needed):
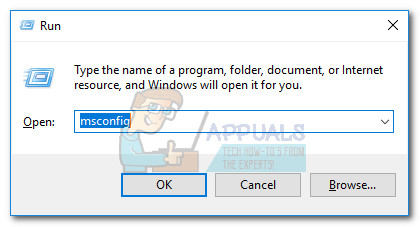
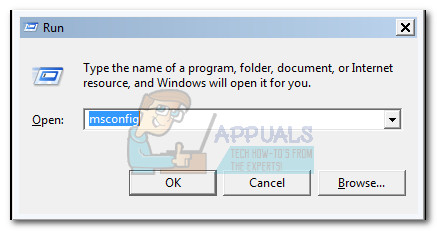
- Press Windows key + R to open a Run window, type “msconfig” and hit Enter to open System Configuration.
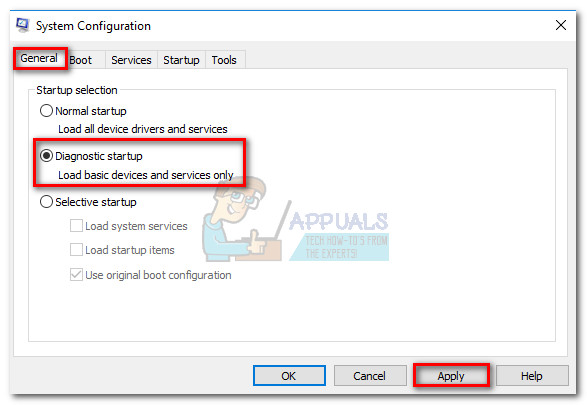
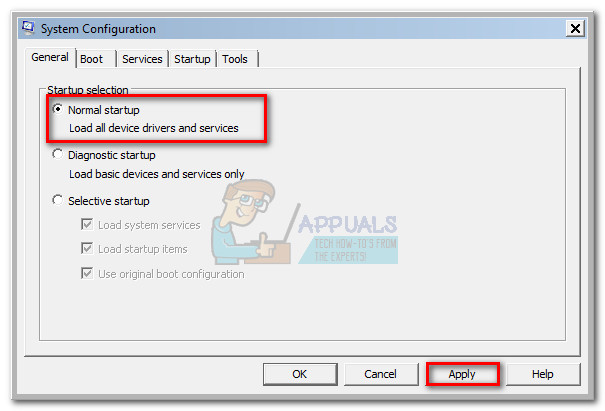
- In System Configuration, go to the General tab, select Diagnostic startup and hit Apply to save this configuration.
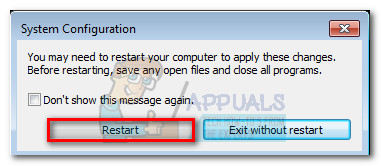
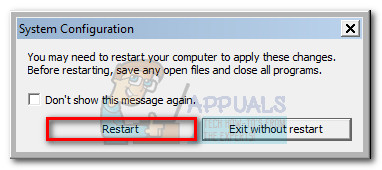
- Click the Restart button at the next System Configuration prompt and wait for your system to reboot.
- Once
your OS is fully loaded, try to access the folder again and see if the
issue is resolved while in Safe Mode. If you’re still unable to access
the folder or file, continue normally with the steps below.
Note: If you can access the folder or file, edit it as per your requirements and skip to step 9.
- Acess the Windows Start bar (bottom-left corner) and search for “cmd“. Then, right-click on Command Prompt and choose Run as Administrator.
Note: You can also run Command Prompt as Administrator by selecting it and pressing Ctrl + Shift + Enter.
- In the elevated Command Prompt, type “net user administrator /active:yes” and hit Enter to enable the hidden Admin account.
- Once you see that the command completed successfully, log out of your current user and you should see a new user named Administrator. Click on it to log in.
- Now
that you have logged into the built-in Administrator account, try to
access the folder or file that is giving you permission issues. You
should be able to access and/or modify it normally now.
- Once you make the necessary edits to the folder/file, use the net user administrator /active:no in an elevated Command Prompt to disable the built-in Administrator account.
- Press Windows key + R to open a Run window, type “msconfig” and hit Enter to open System Configuration.
 Note: Hit Yes if prompted by User Account Control.
- In System Configuration, go to the General tab, select Normal startup and hit Apply to save this configuration.
- Click the Restart button at the next System Configuration prompt and wait for your system to reboot back into normal mode.
That’s it. The
“Unable to display current owner” issue should now be resolved.
TIP: If
none of the Methods have resolved the issue for you, we recommend using
Reimage Repair Tool which can scan the repositories to replace corrupt
and missing files. This works in most cases, where the issue is
originated due to a system corruption. Reimage will also optimize your
system for maximum performance. You can download Reimage by Clicking Here