How to mass export Tasks from Windows Task Scheduler
How to mass export Tasks from Windows Task Scheduler
All the Tasks created in Windows 10 are available in a Task Folder. It is available in the Windows System Directory which in my case is C:\Windows\System32\Tasks.
- Navigate to Tasks Folder. You will be prompted for admin permission.
- Here you will see a couple of folders with some files inside it.
They represent the same folder structure of the Task Scheduler and files
too have the same name.

- Copy the task files to the machine you want to export. You can also use it to back up your tasks in case your computer needs a reinstallation. It saves time as you don’t have to create them again.
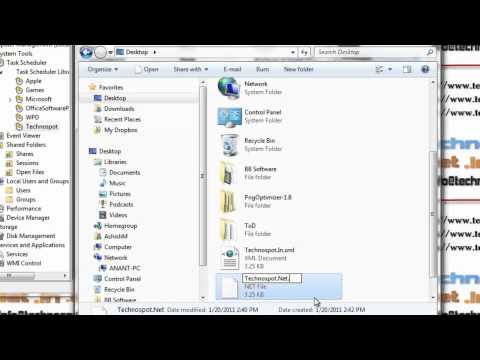
- Rename the files with extension as “.XML”. It is the same extension Task Scheduler uses when you export the tasks.
- Once renamed, now use the Task Scheduler Import task feature to import them one by one. Windows will not recognize them if you drop them directly into the Tasks Folder of Windows.
I wish the mass export and import feature in Windows 10. It will be helpful for many people, especially in Enterprise.
Video Tutorial to mass export Tasks from Windows Task Scheduler
It’s an excellent way to import and export tasks, especially if you want to run the same tasks on multiple PC. Also, it opens up the option to keep a copy of all the tasks when you are reinstalling Windows. All you need to do is copy it again, and it restores all the tasks.
Be aware that if Tasks have file paths it may change when switch computers. Make sure to visit each task, and fix the path, and program names as required.
I hope the post was easy to follow, and you were able to mass export Tasks from Windows Task Scheduler, and later import it back to the same Windows 10 PC or any other PC.
No comments:
Post a Comment
Note: only a member of this blog may post a comment.