Friday 20 May 2022

How to migrate FRS to DFSR Replication Method

 https://itsimple.info/?p=1059

How to migrate FRS to DFSR Replication Method 


When join windows 2016/2019 to domain 2008/2003 you can get error like :


The specified domain %1 is still using the File Replication Service (FRS) to replicate the SYSVOL share. FRS is deprecated.

The server being promoted does not support FRS and cannot be promoted as a replica into the specified domain.

You MUST migrate the specified domain to use DFS Replication using the DFSRMIG command before continuing.

For more information, see https://go.microsoft.com/fwlink/?linkid=849270.


To do that first make sure all Domain Controllers are replicated :

Repadmin /syncall /force /APed

The start migration , Migrate to Prepared State :

Dfsrmig /setglobalstate 1

Make sure the process has finished :

Dfsrmig /getmigrationstate

You should get :

Only then continue with :

Dfsrmig /setglobalstate 2

You should get

Only then continue with :

Dfsrmig /setglobalstate 3

You should get


Then stop the NTFRS File Replication service :

Transferring Active Directory FSMO Roles

 https://9to5it.com/transferring-active-directory-fsmo-roles/

Transferring Active Directory FSMO Roles

Check Active Directory FSMO role placement

Before we get going, I thought it would be a good idea to document how to determine the current location of each FSMO role. To do this, the easiest way is to:

  1. Launch Command Prompt (Start >> Run >> cmd)
  2. From the Command Prompt, run the following:

netdom query fsmo
  1. This will list all of the FSMO roles and on what domain controller they are currently running on.


To move AD FSMO Roles using the command line, do the following:

  1. Log into the DC you want to transfer the role to as an Enterprise Administrator (if transferring the Domain Naming Master or the Schema Master roles). Otherwise you can log in as a Domain Administrator
  2. Launch Command Prompt (Start >> Run >> cmd) Note: You might need to run command prompt in admin mode depending on the Windows version you are running
  3. From the command prompt, type ntdsutil and press Enter
  4. This will enter the ntdsutil command set
  5. Type roles and then press Enter
  6. Type connections and then press Enter
  7. Type connect to server <SERVER_NAME> where <SERVER_NAME> is the name of the domain controller you want to transfer the role(s) to. See example below:

connect to server WP-DC-V02.testlab.com
  1. This will connect you to the server you want the role(s) to be transferred to
  2. Type q and press Enter
  3. Type transfer <ROLE_NAME> where <ROLE_NAME> is the name of the FSMO role you want to transfer. Below is an example of how to transfer each role:

transfer infrastructure master
transfer naming master
transfer PDC
transfer RID master
transfer schema master
  1. Type q and press Enter to quit. Repeat until you have exited the ntdsutil command set

Here is the full set of commands you would type to transfer the PDC Emulator role to the WP-DC-V02 domain controller (Note: At the end of each line you would press Enter):


ntdsutil
roles
connections
connect to server WP-DC-V02.testlab.com
q
transfer PDC

Active Directory FSMO Roles

 https://9to5it.com/active-directory-fsmo-roles/

Active Directory FSMO Roles


First off, a quick intro into how Active Directory works:

Active Directory is a multi-master operations enabled database. In other words, it accepts changes from multiple domain controllers (masters) at the same time. Because of some well developed algorithms conflicts are usually avoided, however there are some instances in where multi-master operations simply wouldn’t work properly and hence there are a few “single-master operations” (FSMO) roles.

FSMO = Flexible Single Master Operations.

The Active Directory FSMO roles are a number of roles or tasks which are required to be run in a single-master operations mode within an Active Directory environment (forest & domain). These tasks run on a specific domain controller, however they can be split so that certain roles run on different DCs (and this is best practise).

There are 5 different types of FSMO roles and each of them are explained below. Some of them are required per domain and some are required per forest.

Forest Based Roles

There are 2 roles which are required per Microsoft Windows Forest. These are:

Schema Master

As the name suggest, this role is used to replicate the schema between all domain controllers within the forest. Because of this, this role is found within the root domain of the forest only – and therefore there is only one per forest.

Domain Naming Master

This role also resides within the root domain of the forest (and there can only be one of them). Its job is to process all changes to the directory namespace. In other words the addition or removal of child domains within the forest. It also takes care of any additions or removals of cross references to domains within other forests (e.g. domain or forest trusts).

Domain Based Roles

There are 3 roles which are required within each domain. These are:

Relative ID Master

This is a really important role, as it manages the Relative ID (RID) pool for the domain. A RID is used every time a security principal object is created within the Active Directory domain (e.g. a user, group, computer, etc). Each security principal object within the domain has its own unique Security Identifier (SID), which is made of the domain’s SID + a unique RID from the domain controller’s assigned pool.

When a domain controller’s unused RID pool is running low, it contacts the Relative ID Master to get some more. The Relative ID Master then allocates more to the domain controller from the domain’s unallocated RID pool – which is manage and maintained by the Relative ID Master. Therefore there can only be one of these per domain.

Infrastructure Master

Used to handle all cross domain object references (i.e. when an object in Domain A is referenced by another object in Domain B). A common example of this would be if you add a user in Domain A to a security group within Domain B. There can only be one of these per domain.

When the AD Recycle Bin feature is not enabled, the Infrastructure FSMO role owner is the DC responsible for updating a cross-domain object reference in the event that the referenced object is moved, renamed, or deleted. In this case, the Infrastructure Master role should be held by a domain controller that is not a Global Catalog server. If the Infrastructure Master runs on a Global Catalog server, it will not update object information, because it does not contain any references to objects that it does not hold. This is because a Global Catalog server holds a partial replica of every object in the forest.

When the AD Recycle Bin feature is enabled, every DC is responsible for updating its cross-domain object references in the event that the referenced object is moved, renamed, or deleted. In this case, there are no tasks associated with the Infrastructure FSMO role, and it is not important which domain controller owns the Infrastructure Master role.

For more information about the Global Catalog, see this article >> The Active Directory Global Catalog Server.

PDC Emulator

The PDC Emulator is the “worker” of all the Active Directory FSMO roles, as it does the most work by far. There can only be one of these per domain. The PDC Emulator performs the following functions:

  1. Time syncronisation for all computers within the domain. This is very important as time syncronisation is required by the Kerberos authentication protocol.
  2. Password changes performed by other domain controllers in the domain are replicated preferentially to the PDC Emulator.
  3. If a logon authentication fails at a given DC in the domain due to a bad password, the DC will forward the authentication request to the PDC Emulator to validate the request against the most current password. If the PDC Emulator reports an invalid password to the DC, the DC will send back a bad password failure message to the user.
  4. Account lockouts are processed on the PDC Emulator.
  5. Editing or creation of Group Policy Objects (GPO) is always done from the GPO copy found in the PDC Emulator’s SYSVOL share, unless configured not to do so by the administrator.
  6. Emulates the functions of a Windows NT 4.0 PDC in a mixed mode environment where NT 4.0 BDCs still exist (not that this would be very common anymore).

Considerations for placement of FSMO Roles

When deciding where and how to place each of the FSMO roles, take into consideration these recommendations:

  • The Schema Master should be placed on the PDC of the forest root domain
  • The Domain Naming master should be placed on the PDC of the forest root domain
  • Place your PDC on your best hardware and in a location that contains replica Domain Controllers within the same AD site and domain
  • Place the RID master on the domain PDC
  • In a multi-domain forest, place the Infrastructure Master on a non-global catalog domain controller. If every domain controller is a global catalog, then there is no work for the Infrastructure Master so you can place it anywhere
  • In a single-domain forest, there is no work for the Infrastructure Master so therefore it can be placed on any domain controller

For more information regarding best practises for the placement of the Active Directory FSMO roles, see Microsoft KB223346.

Transferring Active Directory FSMO Roles

If you want to know how to move one or all of the AD FSMO roles between domain controllers, then check out my Transferring Active Directory FSMO Roles article.

Thursday 19 May 2022

Regex Match All Except a Specific Word, Character, or Pattern

https://regexland.com/regex-match-all-except/

Regex Match All Except a Specific Word, Character, or Pattern


A regular expression that matches everything except a specific pattern or word makes use of a negative lookahead. Inside the negative lookahead, various unwanted words, characters, or regex patterns can be listed, separated by an OR character.

For example, here’s an expression that will match any input that does not contain the text “ignoreThis”.

/^(?!.*ignoreThis).*/

Note that you can replace the text ignoreThis above with just about any regular expression, including:

  • A word (e.g. apple or password)
  • A set of unwanted characters in square brackets (e.g. [aeiou])
  • A regex pattern (e.g. mis{2}is{2}ip{2}i)
  • A list of regex patterns separated by the OR sybmol |(e.g. (cats?|dogs?)

Before we dive into each of these, let’s first discuss how the whole thing works:

ALSO READ: Regex Match Everything After A Specific Character

How The Main Expression Works

To begin our expression, we first start by allowing everything to be matched. This is done by the dot symbol . which matches any character, followed by a zero-or-more quantifier *. This allows us to match zero or more of any character:

/.*/

Next, we add a negative lookahead, written in the form (?!abc). The negative lookahead looks ahead into the string to see if the specified expression (abc in this case) is present. It work by only checking whether the abc expression is present, without actually matching or returning the expression.

/(?!abc).*/

Note that we place the negative lookahead at the start of the expression to ensure that it is validated before anything else is checked.

The expression above will now start from the first character in the string, checking every substring for abc, and won’t match if it finds this expression. However, upon validating the substring starting with the second character, bc, the test will fail since bc is not equal to abc. Therefore, the remainder of the string will be matched. To prevent this from happening, we need to provide a start-of-string anchor ^:

/^(?!abc).*/

This anchor forces the matched expression to start at the beginning of the string and ensures that no subsequent sub-strings can be matched.

Finally, this expression above will reject any string starting with abc but will accept any string that starts with a different character followed by abc. In other words, it will accept aabc or xabc.

To prevent this from happening, we need to provide an additional expression that will notice the characters at the start of the string, together with the unwanted expression. To do this, we need to add another dot character . and zero-or-more quantifier * that will notice zero-or-more characters in front of the unwanted expression.

/^(?!.*abc).*/

Notice that we place the .* inside the negative lookahead. If we placed it in front of the negative lookahead, the entire string will be matched before the negative lookahead is even checked.

And this completes the general expression required. We can now tweak it to suit specific use-cases.

Let’s look at some examples.

Match All Except a Specific Word

To match everything except a specific word, we simply enter the unwanted word inside the negative lookahead. The following expression will not match any string containing the word foo:

/^(?!.*foo).*/

We can list multiple unwanted words by separating them with the OR symbol |. The following expression will ignore strings that contain any of the words dollar, euro, or pound:

/^(?!.*(dollar|euro|pound)).*/

Notice that we need to enclose the list of unwanted words in round brackets () for this to work correctly. If the round brackets are ignored, the .* at the front of the negative lookahead will work together with dollar but not with euro or pound, causing sentences that contain other characters before these unwanted words to be matched.

Match All Except a Specific Character

To match everything except a specific character, simply insert the character inside the negative lookahead. This expression will ignore any string containing an a:

/^(?!.*a).*/

If the character you want to exclude is a reserved character in regex (such as ? or *) you need to include a backslash \ in front of the character to escape it, as shown:

/^(?!.*\?).*/

For a set of characters, one can include them in square brackets. Note that special characters inside square brackets don’t need to be escaped. The following expression will not match any string that contains a vowel:

/^(?!.*[aeiou]).*/

Match All Except a Specific Pattern

In addition to unwanted words or characters, one can specify a pattern that must be avoided in all matches. The pattern must be placed inside the negative lookahead:

For example, this expression will not match any string that contains three consecutive digits \d:

/^(?!.*\d{3}).*/

The following expression will not match any spelling of the word grey or gray:

/^(?!.*gr(e|a)y).*/

Match All Except a List of Patterns

Finally, patterns can be combined by enclosing them in parentheses () and separating them using the OR symbol |.

The following expression will not match any string containing three consecutive digits \d, nor a string containing a vowel:

/^(?!.*(\d{3}|[aeiou])).*/

Lookahead Support

It should be noted that some programming languages does not support lookaheads in their regex implementations and will therefore not be able to run the expressions above.

Installing Chocolatey

 https://chocolatey.org/install

Installing Chocolatey

Install Chocolatey for Individual Use:

  1. First, ensure that you are using an administrative shell - you can also install as a non-admin, check out Non-Administrative Installation.
  2. Install with powershell.exe

    📝 NOTE: Please inspect https://community.chocolatey.org/install.ps1 prior to running any of these scripts to ensure safety. We already know it's safe, but you should verify the security and contents of any script from the internet you are not familiar with. All of these scripts download a remote PowerShell script and execute it on your machine. We take security very seriously. Learn more about our security protocols.

    With PowerShell, you must ensure Get-ExecutionPolicy is not Restricted. We suggest using Bypass to bypass the policy to get things installed or AllSigned for quite a bit more security.

    • Run Get-ExecutionPolicy. If it returns Restricted, then run Set-ExecutionPolicy AllSigned or Set-ExecutionPolicy Bypass -Scope Process.

    Now run the following command:

    >
  1. Paste the copied text into your shell and press Enter.
  2. Wait a few seconds for the command to complete.
  3. If you don't see any errors, you are ready to use Chocolatey! Type choco or choco -? now, or see Getting Started for usage instructions.

Installing OCRmyPDF

 https://ocrmypdf.readthedocs.io/en/latest/installation.html#installing-on-windows

Installing OCRmyPDF

Installing on Windows

Native Windows

Note

Administrator privileges will be required for some of these steps.

You must install the following for Windows:

  • Python 3.7 (64-bit) or later

  • Tesseract 4.0 or later

  • Ghostscript 9.50 or later

Using the Chocolatey package manager, install the following when running in an Administrator command prompt:

  • choco install python3

  • choco install --pre tesseract

  • choco install ghostscript

  • choco install pngquant (optional)

The commands above will install Python 3.x (latest version), Tesseract, Ghostscript and pngquant. Chocolatey may also need to install the Windows Visual C++ Runtime DLLs or other Windows patches, and may require a reboot.

You may then use pip to install ocrmypdf. (This can performed by a user or Administrator.):

  • pip install ocrmypdf

Chocolatey automatically selects appropriate versions of these applications. If you are installing them manually, please install 64-bit versions of all applications for 64-bit Windows, or 32-bit versions of all applications for 32-bit Windows. Mixing the “bitness” of these programs will lead to errors.

OCRmyPDF will check the Windows Registry and standard locations in your Program Files for third party software it needs (specifically, Tesseract and Ghostscript). To override the versions OCRmyPDF selects, you can modify the PATH environment variable. Follow these directions to change the PATH.

Warning

As of early 2021, users have reported problems with the Microsoft Store version of Python and OCRmyPDF. These issues affect many other third party Python packages. Please download Python from Python.org or Chocolatey instead, and do not use the Microsoft Store version.

Windows Subsystem for Linux

  1. Install Ubuntu 20.04 for Windows Subsystem for Linux, if not already installed.

  2. Follow the procedure to install OCRmyPDF on Ubuntu 20.04.

  3. Open the Windows command prompt and create a symlink:

wsl sudo ln -s  /home/$USER/.local/bin/ocrmypdf /usr/local/bin/ocrmypdf

Then confirm that the expected version from PyPI (OCRmyPDF latest released version on PyPI) is installed:

wsl ocrmypdf --version

You can then run OCRmyPDF in the Windows command prompt or Powershell, prefixing wsl, and call it from Windows programs or batch files.


List all Domain Controllers in Domain


List all Domain Controllers in Domain


Get-AdDomainController cmdlet in PowerShell use to get list of domain controllers in domain in Active Directory. As administrators, it’s very important to know resources in an active directory and manage an active directory efficiently.

Get-AdDomainController gets the domain controller specified by Identity, Filter, or Discover parameter. There are other ways to get list of domain controllers in domain using Get-ADGroupMember, Get-AdForest cmdlet in PowerShell.

In this article, I will show you how to get list of domain controllers using the Get-AdDomainController cmdlet in PowerShell.

List all Domain Controllers in Domain

To get list of domain controllers in domain use the Get-AdDomainController cmdlet in PowerShell as below

$DomainName = (Get-ADDomain).DNSRoot
$DCList = Get-ADDomainController -Filter * -Server $DomainName | Select-Object Hostname,Site,OperatingSystem

In the above PowerShell script, Get-AdDomain PowerShell cmdlet gets AD domain name and stored in variable $DomainName.

The second command, Get-AdDomainController cmdlet uses the Server parameter to list all domain controllers in the specified domain name and passes the object to select HostName, Site, and OperatingSystem.

The output of the above script to get list of domain controllers is given below

List all Domain Controllers in Domain

Get all Domain Controllers using Get-AdGroupMember

You can use the Get-AdGroupMember cmdlet in PowerShell to get all domain controllers in the domain as given below

Get-ADGroupMember 'Domain Controllers'

This command uses the Get-AdGroupMember cmdlet to get all domain controllers, output is given below

distinguishedName : CN=ENGG-PRO,OU=Domain Controllers,DC=SHELLPRO,DC=LOCAL
name              : ENGG-PRO
objectClass       : computer
objectGUID        : dbf93c91-4f31-401e-b924-88cfed6b16c0
SamAccountName    : ENGG-PRO$
SID               : S-1-5-21-1426734019-4042446242-464921959-1000

List all Domain Controllers in Forest

You can use the Get-AdForest cmdlet in PowerShell to list all domain controllers for all domains in a forest as given below

$DCList = (Get-ADForest).Domains | %{ Get-ADDomainController -Filter * -Server $_ }

In the above PowerShell cmdlet, Get-AdForest cmdlet gets all domains in a forest and passes the output to the second command.

The second command uses Get-AdDomainController to list all domain controllers for all domains in a forest.

Nltest to list all Domain Controllers

Nltest is a command-line tool used to list all domain controllers in a domain.

Run below command as below

nltest /dclist:SHELLPRO.LOCAL

This command gets all domain controllers in the domain name SHELLPRO.LOCAL

How to check if domain controllers are in sync with each other

 https://www.manageengine.com/products/active-directory-audit/kb/how-to/how-to-check-if-domain-controllers-are-in-sync-with-each-other.html

How to check if domain controllers are in sync with each other


Step 1 - Check the replication health

Run the following command :
Repadmin /replsummary

The “/replsummary” operation quickly summarizes replication state and relative health of a forest.

how-to-check-if-domain-controllers-are-in-sync-with-each-other

Step 2 - Check the inbound replication requests that are queued.

Repadmin /Queue

This command lists elements that are remaining in the replication queue. It displays inbound replication requests that the Domain Controller needs to issue in order to become consistent with its source replication partners.

how-to-check-if-domain-controllers-are-in-sync-with-each-other-2

Step 3 - Check the replication status

Repadmin /Showrepl

This command displays the replication status when the specified domain controller last attempted to implement an inbound replication of Active Directory partitions. It helps in figuring out the replication topology and replication failure.

how-to-check-if-domain-controllers-are-in-sync-with-each-other-3

Step 4 - Synchronize replication between replication partners

Repadmin /syncall

It ensures synchronization between replication partners

Step 5 - Force the KCC to recalculate the topology

Repadmin /KCC

This command forces the KCC (Knowledge Consistency Checker) on targeted domain controller(s) to immediately recalculate its inbound replication topology. It checks and creates the connections between the Domain Controllers. By default KCC runs in the background every 15 minutes to check if a new connection has been established between DCs.

how-to-check-if-domain-controllers-are-in-sync-with-each-other-4

Step 6 - Force replication

Repadmin /replicate

This command forces the replication of the specified directory partition to the destination domain controller from the source DC.

Test login to specific domain controller

Test login to specific domain controller

$Credential = Get-Credential
Get-Aduser  username -Credential $Credential -Server servername


How to match hyphens with Regular Expression

 How to match hyphens with Regular Expression

  • [-] matches a hyphen.
  • [abc-] matches a, b, c or a hyphen.
  • [-abc] matches a, b, c or a hyphen.
  • [ab-d] matches a, b, c or d (only here the hyphen denotes a character rang


Determine number of pages in multipage tiff via command line

 Determine number of pages in multipage tiff via command line

 tiffdump YourFile.tif | grep -c '^Directory'


Powershell Get the most recent file in Directory

https://www.thecodebuzz.com/powershell-get-most-recent-file-in-directory-folder/

Powershell Get the most recent file in Directory

Getting Files from a Given Folder Directory using PowerShell

Get all files from a directory

Get all files from a directory or get all files in a loop for loop in PowerShell.

Command

Get-ChildItem

Example

PS C:\Test> Get-ChildItem

Get-ChildItem method returns the names of files or folders in the specified directory i.e C:\Test

You can specify the path using the below commands as well,

PS C:\Test> Get-ChildItem C:\\Test\Test1

Getting Files from a given Directory using file extension filter

Get all files from a directory,

Command

Get-ChildItem -Attributes !Directory *.* | Sort-Object -Descending -Property LastWriteTime

Get all files from a directory with .txt or .xlsx extension only

Command

Get-ChildItem -Attributes !Directory *.txt| Sort-Object -Descending -Property LastWriteTime

GetChildItemPowershellGetmostrecentfileinDirectorywithfileextensionusingparameters

Get all files from a directory with .jpeg extension only,

Get-ChildItem -Attributes !Directory *.jpeg | Sort-Object -Descending -Property LastWriteTime


Using Parameter to store the list of Names

GetChildItemPowershellGetmostrecentfileinDirectorywithfileextension

The above commands give us a list of all files with the file extension “.xlsx”. We are able to print the file name using $latestfile.Name

Similar way we can easily print different attributes of file names like file name or Last Modified Time or Creation time etc.

PS C:\Test> $latestfile = Get-ChildItem -Attributes !Directory *.png | Sort-Object -Descending -Property LastWriteTime | select -First 1
 PS C:\Test> $latestfile.Name
 TheCodeBuzz.png
 PS C:\Test> $latestfile.CreationTime
 Saturday, April 24, 2021 5:46:49 PM
 PS C:\Test> $latestfile.FullName

Getting a single latest from a given Directory using file extension filter

One can use a combination of properties like LastWriteTime and Select -First 1 to get the latest file in the given directory.

Get a single latest from a given Directory without file filter

Example:

PS C:\Test> $latestfile = Get-ChildItem -Attributes !Directory . | Sort-Object -Descending -Property LastWriteTime | select -First 1

PS C:\Test> $latestfile.Name
Book1.xlsx

powershellscripttofindthelatestfileandcheckitssize

PowerShell- Get the most recent file in Directory with a filter

Get the most recent file in the Directory with a filter,

PS C:\Test> $latestfile = Get-ChildItem -Attributes !Directory *.png | Sort-Object -Descending -Property LastWriteTime | select -First 1


PS C:\Test> $latestfile.Name
TheCodeBuzz.png

PowerShell – Get all files from a given Directory with a filter

If you need to get all the files from the given directory, please use the below logic,

PS C:\Test> $latestfile = Get-ChildItem -Attributes !Directory *.png | Sort-Object -Descending 


Sql query to select from 1 hour ago

 Sql query to select from 1 hour ago?

SELECT NOW() - INTERVAL 1 HOUR;


Last index of a given substring in MySQL

 Last index of a given substring in MySQL

Following statement returns 12:

SELECT CHAR_LENGTH("Have_a_good_day") - LOCATE('_', REVERSE("Have_a_good_day"))+1;

Anticipating a possible use of the value, the following statement extracts the left part of the string before the last underscore(i.e., _):

SELECT LEFT("first_middle_last", CHAR_LENGTH("first_middle_last") - LOCATE('_', REVERSE("first_middle_last")));

The result is "first_middle". If you want to include the delimiter, use:

SELECT LEFT("first_middle_last", CHAR_LENGTH("first_middle_last") - LOCATE('_', REVERSE("first_middle_last"))+1);

It would be nice if they enhanced LOCATE to have an option to start the search from the right.

If you want the right part of the string after the last space a better solution is:

SELECT SUBSTRING_INDEX("first_middle_last", '_', -1);

This returns "last".


Promote Windows Server 2019 to Domain Controller

https://www.windowscrush.com/promote-windows-server-2019-to-domain-controller.html

Promote Windows Server 2019 to Domain Controller

  • Open your Server Dashboard, click Add roles and features link, you can also click menu Manage and choose Add roles and features to continue to install ADDS roles.
  • Once you click Add roles and features link/button, you will get Add roles and features Wizard dialogue box, here you just click Next button.

  • After you click Next button, you will get Select installation type dialogue box, and here, double confirm that the Role-based or feature-based installation is selected (this setting is selected by default), and click Next.
  • On the next process, you will get Select destination server dialogue box, for this step make sure you click Select a server from the server pool. on this page also you can check & double confirm your Server name now is in Server pool.. and click Next.
  • You will see a lot of Roles on the Select server roles dialogue box, here make sure you tick the Active Directory Domain Services box and Add features that are required for Active Directory Domain Services? will automatically pop up, then you just click Add features button to accept the default ADDS components.

  • Double confirm your selection which is Active Directory Domain Services and click Next button.
  • On the Select features, just click the Next button.
  • On the Active Directory Domain Services dialogue box, click Next then click Install
  • Once your ADDS installation is done without any error,  click Close

  • Next, open your Server Dashboard, click on the yellow exclamation mark to open the drop menu.. here you have to click Promote this server to a domain controller link to start ADDS deployment.

  • On the Deployment Configuration dialogue box, make sure you click Add a new forest button, this is because this Server is our very new server for our new domain. On the Root domain name, type your new domain name, for this example I’m using phuong.local.. and then click Next.

  • On the Domain Controller Options, since this will be my new Infrastructure and all my existing server also running Server 2016, I just leave the Forest & Domain functional level as Windows Server 2016. Under Specify domain controller capabilities, Domain Name System (DNS) server is selected by default (in case you have a different DNS server, please un-tick the DNS box & make sure you change the preferred DNS IP address in the Network & Sharing Center point to your existing DNS server..). Under the Type the Directory Services Restore Mode (DSRM) password, key in any password that belongs to Administrator and click Next.
  • On the DNS options dialogue box, just click Next.
  • On the Additional Options dialogue box, verify that your NetBIOS is pointing to your existing domain name.. and click Next.
  • On the Paths dialogue box, you can just leave it the setting you can choose to point the ADDS database, log & sysvol file to a different location.. and click Next.
  • Once you click next, you can review all your previous step & settings on the Review Options dialogue box.. if all correct click Next.
  • On the Prerequisites Check dialogue box, you can see “All prerequisite check passed successfully. Click install to begin installation..” so just click Install button.

  • If everything goes well.. you can see the AD installation progress is starting.. just wait for few minutes for the process to complete.. and your Server 2019 will auto reboot.
  • After your Server 2019 reboot, you now can log in as a Domain Administrator.
  • Once you successfully log in, open your Server Dashboard and take few minutes to go open Active Directory Users & Computers and DNS Manager.. this is just to double check that all the installation is 100% successfully.

That’s it. Enjoy working.


How to use Let’s Encrypt with IIS on Windows Server 2016

 https://www.snel.com/support/lets-encrypt-on-windows-server-2016/

How to use Let’s Encrypt with IIS on Windows Server 2016


Download Let’s Encrypt Client

In this tutorial, we will use the win-acme client as it is open-source and actively developed. It can both generate and renew SSL certificates.

Download the latest version of the client from its Github releases page. Scroll down to the assets on the page and download the zip file with the name win-acme.v2.1.x.xxx.x64.trimmed.zip. For most users, the trimmed x64 release should be fine but in case you need to use any plugins, you should get the pluggable file. In this tutorial, we will use the trimmed file.

If you have trouble using Internet Explorer, you can follow our tutorial to install Google Chrome on the Windows Server. Once downloaded, extract win-acme to a safer location.

Step 5: Generate Let’s Encrypt Certificates

To generate the certificate, simply run wacs.exe from the client’s folder. Once the application starts, follow these steps.

  • Press N on the initial menu to choose the option to “Create a new certificate”.
  • Next, it will ask you which website(s) should be scanned for hostnames. You will be presented with a list of sites on your IIS server. Select the number corresponding to your site. (2 in our tutorial)

win acme

  • Next, it will list the site bindings(URLs) corresponding to your selection and ask you to select a binding. Since we had only 1 URL, we will choose option 3 which represents all bindings.
  • It will then ask you to confirm your selection. Enter y to proceed.

win acme screenshot

  • Next, it will ask you for your email address to send renewal notices. Enter your email id and enter n & y for the next two options to agree to the terms. You can also enter y for both the options but then it tries to open the TOS(Terms of Service) in the default pdf application which if you don’t have any will just result in a popup window you will need to dismiss.
  • That’s it. Your certificate is now ready for use. It will also create a scheduled task that will run daily to renew your certificate.

win acme downloads

Step 6: Verify SSL

To verify that the SSL is working, launch https://s30239.hosted-by-snel.com in your browser and you can see the valid certificate sign in the address bar. 

secure connection

Conclusion

That’s all for this tutorial. We covered how to install IIS server, set up a basic website and install SSL for your site using Let’s Encrypt service.

Adding a 2019 Domain Controller to an Existing Domain with a 2008 DC

 https://ond360.com/windows-server/adding-a-2019-domain-controller-to-a-2008-forest/

Adding a 2019 Domain Controller to an Existing Domain with a 2008 DC

Before a 2019 Domain Controller can be added to an existing domain with one or more 2008 DC’s, the Functional Level of both the Domain and Forest must be at least 2008. Otherwise, you will see this error – “Verification of replica failed. The forest functional level is not supported. To install a WIndows 2019 domain or domain controller, the forest functional level must be Windows Server 2008 or higher.”

Verification of Replica Failed

1. On the existing 2008 Domain Controller, open Active Directory Domains and Trusts. Right-click on Active Directory Domains and Trusts and select “Raise Forest Functional Level…”

Raise Forest Functional Level.

2. Make sure the Forest Level is set to Windows 2008 or Windows Server 2008 R2. If not, select Windows Server 2008 or 2008 R2 and click OK.

Raise Forest Functionality Level 2008

3. After setting the Forest Functional Level to 2008, we need to raise the domain Functional Level. Open Active Directory Users and Computers, then right-click the Domain name and select “Raise domain functional level…”

Raise Domain Functional Level 2008

4. Now you should be able to add the 2019 Domain Controller to the existing Forest. However, when adding the new DC, you may run into this error – “Verification of replica failed. The specified domain <yourDomain> is still using the File Replication Service (FRS) to replicate the SYSVOL share. FRS is deprecated.”

5. If you run into the above error. You will need to migrate to DFS from FRS. This is the official guide from Microsoft. It looks a little intimidating but it is actually easy to follow and worked for us.

https://docs.microsoft.com/en-us/previous-versions/windows/it-pro/windows-server-2008-R2-and-2008/dd640019(v=ws.10)?redirectedfrom=MSDN

NOTE: If you need to migrate the FSMO Roles over to the new Domain Controller, please checkout our article on Transferring FSMO roles.


Migration of FRS to DFSR SYSVOL

 https://techcommunity.microsoft.com/t5/storage-at-microsoft/streamlined-migration-of-frs-to-dfsr-sysvol/ba-p/425405

Migration of FRS to DFSR SYSVOL

Assumptions

1. You already know your way around Active Directory and SYSVOL. If you are new to these technologies, stop reading this blog post and use the DFSR SYSVOL migration guide for your migration instead. It’s much more comprehensive.

2. You already deployed at least Windows Server 2008 to all domain controllers in the domain and there are no remaining Windows Server 2003 or Windows Server 2003 R2 domain controllers.

3. If using Windows Server 2008 or Windows Server 2008 R2 domain controllers, you have deployed the latest version of Robocopy.exe . The latest WS2008 version as of this writing is KB2644882 ; the latest WS2008 R2 is KB2646535 ). This is an optional but recommended step ; it ensures efficient preseeding of data during the migration, but migration still works even without them. If using Windows Server 2012 or later operating systems, there’s no need to update robocopy. For more information, review KB2567421 .

4. You already raised the domain functional level to at least Windows Server 2008, using Domain.msc or the Set-ADDomainMode Windows PowerShell cmdlet.


thumbnail image 1 of blog post titled 


							Streamlined Migration of FRS to DFSR SYSVOL


thumbnail image 2 of blog post titled 


							Streamlined Migration of FRS to DFSR SYSVOL


Some handy advice before you begin

For faster migration performance, be aware of how to make AD performance faster - Repadmin.exe /syncall and change notification are your friends, but like the robocopy patches above, are optional. DFSR migration only goes as fast as AD replication. For instance, this command will force push replication of all partitions while ignoring the schedules (this is a rather sledgehammer example):


Repadmin /syncall /force /APed


Furthermore, DFSR SYSVOL only replicates when AD has an open schedule (DFSR does not know about change notification). Ensure you have configured AD site links for continuous replication, if you want DFSR to replicate as fast as change notification.

Finally, DFSR reads and writes its new migration state every 5 minutes on each DC. You can speed this up by using Dfsrdiag.exe pollad or the new Update-DfsrConfigurationFromAD Windows PowerShell cmdlet (if all your DCs are running Windows Server 2012 R2). For the latter, a slick way to update every DC in the domain at once is to combine with the AD cmdlets (this sample is a single wrapped line):


Get-ADDomainController -Server corp.contoso.com -Filter * | % { Update-DfsrConfigurationFromAD -ComputerName $_.name -Verbose }


Once you start the migration, running repadmin forced syncs and dfsrdiag forced polls after each migration step will greatly speed up the processing. Or you can just wait and let things happen naturally - that’s fine too.


Quick Migration

In this case, the health of AD and SYSVOL on all domain controllers is not known. For instance, you are not using System Center Operations Manager to monitor your domain controllers for AD replication, SYSVOL availability, and free disk space.

The goal of the Quick Migration scenario is to test the conditions of the domain controllers, then migrate SYSVOL to DFSR, with the ability to roll back during the process.

1. Ensure free disk space - The DFSR migration process copies the contents of SYSVOL to a parallel folder called SYSVOL_DFSR, and then shares out that copy during the Redirection phase. This means that on the volume where your SYSVOL exists on domain controllers - typically the C: drive - you need at least as much free space as the size of the current SYSVOL folder, plus a 10% fudge factor. For instance., if your current SYSVOL folder is 2GB (an unusually large SYSVOL), you should ensure that at least 2.2 GB disk space is free on the same volume. Most SYSVOL are only a few hundred MB or less.

An easy way to determine the free disk space on a bunch of remote DCs is with Psinfo.exe -d . Look here for more info. The WMI Win32_LogicalDisk class is also a possibility, such as through Windows PowerShell:


Get-WmiObject -Class win32_logicaldisk -ComputerName srv01,srv02,srv03 | FT systemname,deviceid,freespace -auto


You can get fancier here, first looking on each computer to decide which volume hosts SYSVOL and comparing sizes and such, but this is the quick migration guide!

Note: you can greatly decrease the size of your SYSVOL by preventing legacy ADM replication using KB813338 . A hundred group policies with 50 registry settings apiece is unlikely to exceed 5MB total when creating group policies using Windows Vista or later. The ADMX central store and alternatives are available for servicing.

2. Ensure correct security policy - You must ensure that the built-in Administrators group has the “Manage Auditing and Security Log” user right on all your domain controllers. This is on by default, so if it’s not set, someone yanked it. Microsoft does not support removing that, no matter what you may have read elsewhere. To validate, examine the group policy applied to your domain controllers by using Gpresult.exe. For more info, examine KB2567421 .


thumbnail image 3 of blog post titled 


							Streamlined Migration of FRS to DFSR SYSVOL


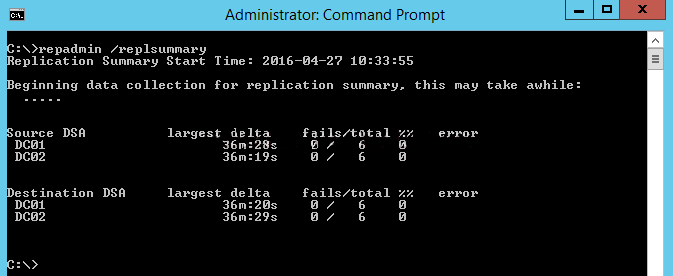
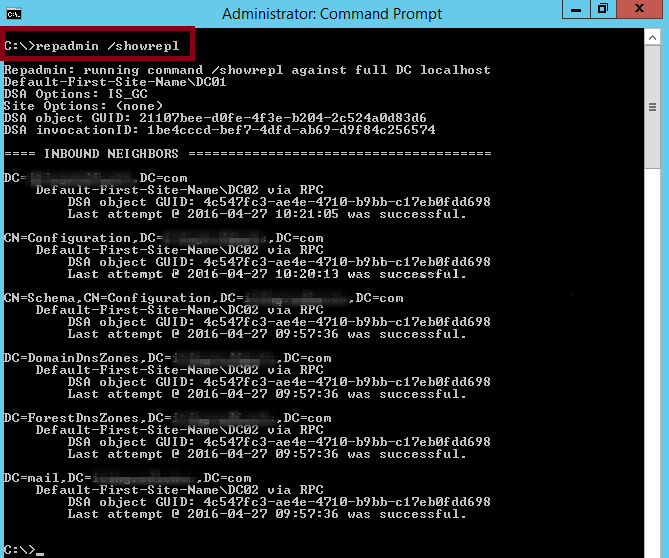
3. Ensure AD replication is working - The DFSR migration depends entirely on each domain controller receiving and sending state changes via AD replication. There are many ways to examine AD health, but the easiest is probably the Active Directory Replication Status Tool . Install the utility and scan your domain for errors; if there are problems, fix them and then continue. Don’t attempt a DFSR migration unless all your domain controllers are replicating AD correctly.


thumbnail image 4 of blog post titled 


							Streamlined Migration of FRS to DFSR SYSVOL


Ideally, when you set “Errors Only” mode on, it looks like this:

thumbnail image 5 of blog post titled 


							Streamlined Migration of FRS to DFSR SYSVOL


thumbnail image 6 of blog post titled 


							Streamlined Migration of FRS to DFSR SYSVOL

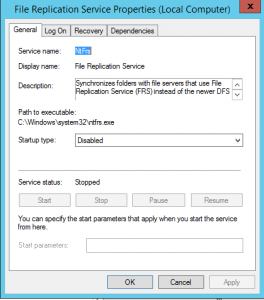
Optionally, you can also verify that FRS replication is working. I wrote a piece on using FRSDiag for this years ago. I don't think it's important to do so, though. Your existing FRS not working isn't going to matter much for this migration as DFSR is going to override it and use the PDC Emulator as the source no matter what stat FRS is in. Fixing FRS issues in order to then throw it away isn't a good use of time.


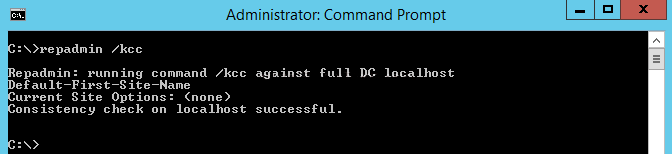
4. Ensure SYSVOL is shared - DFSR migration naturally depends on SYSVOL itself; it must already be shared and the DC must be advertising and available, or migration at each stage will never complete. The simplest way to check all your domain controllers is with the Dcdiag.exe command using two specific tests:


Dcdiag /e /test:sysvolcheck /test:advertising


Don’t attempt a DFSR migration unless all your domain controllers are passing the connectivity, SYSVOL, and advertising tests with no errors.

They should look like this:


thumbnail image 7 of blog post titled 


							Streamlined Migration of FRS to DFSR SYSVOL


5. Migrate to Prepared State - Now you will migrate to the Prepared state, where both FRS and DFSR are replicating their own individual copies of SYSVOL, but the FRS copy mounts the SYSVOL and Netlogon shares. On the PDC Emulator domain controller, run (as an elevated domain admin):


Dfsrmig /setglobalstate 1


Now you wait for this AD value on the PDCE to converge on all domain controllers, then for DFSR to switch to Prepared state on each domain controller and update AD, and finally for that value to replicate back to the PDCE. Use the following command to see progress:


Dfsrmig /getmigrationstate


When all DCs are ready, the output will look like this:


thumbnail image 8 of blog post titled 


							Streamlined Migration of FRS to DFSR SYSVOL


As I mentioned in the advice section, you can speed this processing up with faster AD replication and DFSR polling.

6. Migrate to Redirected State - Now you will migrate to the Redirected state, where both FRS and DFSR are replicating their own individual copies of SYSVOL, but the DFSR copy mounts the SYSVOL and Netlogon shares. On the PDC Emulator domain controller, run (as an elevated domain admin):


Dfsrmig /setglobalstate 2


Now you wait for this AD value on the PDCE to converge on all domain controllers, then for DFSR to switch to Redirected state on each domain controller and update AD, and finally for that value to replicate back to the PDCE. Use the following command to see progress:


Dfsrmig /getmigrationstate


When all DCs are ready, the output will look like this:


thumbnail image 9 of blog post titled 


							Streamlined Migration of FRS to DFSR SYSVOL


7. Migrate to Eliminated State - Finally, you will migrate to the Eliminated state, where DFSR is replicating SYSVOL and FRS is removed. Unlike the Prepared and Redirected states, there is no way to go backwards from this step - once executed, FRS is permanently stopped and cannot be configured again. On the PDC Emulator domain controller, run (as an elevated domain admin):


Dfsrmig /setglobalstate 3


Now you wait for this AD value on the PDCE to converge on all domain controllers, then for DFSR to switch to Eliminated state on each domain controller and update AD, and finally for that value to replicate back to the PDCE. Use the following command to see progress:


Dfsrmig /getmigrationstate


When all DCs are ready, the output will look like this:


thumbnail image 10 of blog post titled 


							Streamlined Migration of FRS to DFSR SYSVOL


Your migration is complete.


Express Migration

In this case, the health of AD and SYSVOL on all domain controllers is known to be healthy. For instance, you are using System Center Operations Manager to monitor your domain controllers and ensure that AD replication, SYSVOL availability, and free disk space are all nominal.

The goal of the Express Migration scenario is to migrate SYSVOL to DFSR with the ability to roll back during the process.

1. Ensure correct security policy - You must ensure that the built-in Administrators group has the “Manage Auditing and Security Log” user right on all your domain controllers. This is on by default, so if it’s not set, someone yanked it. Microsoft does not support removing that, no matter what you may have read elsewhere. To validate, examine the group policy applied to your domain controllers by using Gpresult.exe . For more info, examine KB2567421 .

2. Migrate to Prepared State - Now you will migrate to the Prepared state, where both FRS and DFSR are replicating their own individual copies of SYSVOL, but the FRS copy mounts the SYSVOL and Netlogon shares. On the PDC Emulator domain controller, run (as an elevated domain admin):


Dfsrmig /setglobalstate 1


Now you wait for this AD value on the PDCE to converge on all domain controllers, then for DFSR to switch to Prepared state on each domain controller and update AD, and finally for that value to replicate back to the PDCE. Use the following command to see progress:


Dfsrmig /getmigrationstate


When all DCs are ready, the output will look like this:


thumbnail image 11 of blog post titled 


							Streamlined Migration of FRS to DFSR SYSVOL


As I mentioned in the advice section, you can speed this processing up with faster AD replication and polling.

3. Migrate to Redirected State - Now you will migrate to the Redirected state, where both FRS and DFSR are replicating their own individual copies of SYSVOL, but the DFSR copy mounts the SYSVOL and Netlogon shares. On the PDC Emulator domain controller, run (as an elevated domain admin):


Dfsrmig /setglobalstate 2


Now you wait for this AD value on the PDCE to converge on all domain controllers, then for DFSR to switch to Redirected state on each domain controller and update AD, and finally for that value to replicate back to the PDCE. Use the following command to see progress:


Dfsrmig /getmigrationstate


When all DCs are ready, the output will look like this:


thumbnail image 12 of blog post titled 


							Streamlined Migration of FRS to DFSR SYSVOL


4. Migrate to Eliminated State - Finally, you will migrate to the Eliminated state, where DFSR is replicating SYSVOL and FRS is removed. Unlike the Prepared and Redirected states, there is no way to go backwards from this step - once executed, FRS is permanently stopped and cannot be configured again. On the PDC Emulator domain controller, run (as an elevated domain admin):

Dfsrmig /setglobalstate 3


Now you wait for this AD value on the PDCE to converge on all domain controllers, then for DFSR to switch to Eliminated state on each domain controller and update AD, and finally for that value to replicate back to the PDCE. Use the following command to see progress:

Dfsrmig /getmigrationstate


When all DCs are ready, the output will look like this:


thumbnail image 13 of blog post titled 


							Streamlined Migration of FRS to DFSR SYSVOL


Your migration is complete.


Hyper Migration

In this case, the health of AD and SYSVOL on all domain controllers is known to be healthy. For instance, you are using System Center Operations Manager to monitor your domain controllers and ensure that AD replication, SYSVOL availability, and free disk space are all nominal.

The goal of the Hyper Migration scenario is to migrate SYSVOL to DFSR with the fewest steps and no ability to roll back the migration process once commenced.

1 . Ensure correct security policy - You must ensure that the built-in Administrators group has the “Manage Auditing and Security Log” user right on all your domain controllers. This is on by default, so if it’s not set, someone yanked it. Microsoft does not support removing that, no matter what you may have read elsewhere. To validate, examine the group policy applied to your domain controllers using Gpresult.exe . For more info, examine KB2567421 .

2. Migrate to Eliminated State - DFSR does not mandate that you must migrate through each stage at a time. If you wish, you can trigger migrating all the way to the Eliminated state immediately, where DFSR is replicating SYSVOL and FRS is removed. Unlike the incremental Prepared and Redirected states, there is no way to go backwards from this step - once executed, FRS is permanently stopped and cannot be configured again. On the PDC Emulator domain controller, run (as an elevated domain admin):


Dfsrmig /setglobalstate 3


thumbnail image 14 of blog post titled 


							Streamlined Migration of FRS to DFSR SYSVOL


Now you wait for this AD value on the PDCE to converge on all domain controllers, then for DFSR to switch to Eliminated state on each domain controller and update AD, and finally for that value to replicate back to the PDCE. This will happen for the Prepared, Redirected, and Eliminated stages sequentially, with no need to run each command. Use the following command to see progress:


Dfsrmig /getmigrationstate


When all DCs are ready, the output will look like this:


thumbnail image 15 of blog post titled 


							Streamlined Migration of FRS to DFSR SYSVOL


Your migration is complete.

Naturally, anything faster than Hyper Migration requires your own Schwarzschild Wormhole.


Final Notes

Since you are probably new to SYSVOL using DFSR - and maybe DFSR in general - I highly recommend you review these two KB articles:


They cover the scenario where DFSR may pause replication - due to a power failure or hardware problem - and wait for you to manually resume it. This initially leads to group policy not replicating, but more importantly, eventually leads to a quarantined server. With our latest hotfixes and operating systems, Microsoft recommends disabling this pausing behavior and allow DFSR to resume. If using Windows Server 2008 R2 or Windows Server 2012, use KB2846759 to always automatically resume replication (see section “How to disable the Stop Replication functionality in AutoRecovery”). It’s a simple registry entry, and you can deploy it manually or using Group Policy Preferences . Windows Server 2012 R2 and later default to auto-resuming, so there is nothing to do there.

We went from 52 pages down to a handful, and that was with plenty of screenshots and blather. Now you are running DFSR for SYSVOL and prepared for the future of Windows Server.

Blog Archive